Best Backpacking Tripod for Hikers (2026)
Six backpacking tripods compared by weight, folded length, maximum height and load rating, plus how to choose between aluminum and carbon fiber, and travel, tabletop or full-size formats.
HikingCare is reader-supported. When you buy through links on our site we may earn a commission at no extra cost to you. How we choose what to recommend.
🎒 Quick answer
What is the best backpacking tripod? For most hikers, the Peak Design Travel Tripod (Carbon Fiber) is the best all-around pick, at about 2.8 pounds with a 20-pound load rating. If shaving every last ounce matters more than anything else, the SIRUI Traveler X-III weighs about 2.1 pounds instead.
Below we compare six tripods by weight, folded length, maximum height and load rating, using specs published on each maker’s own site or Amazon listing as of September 2026. We also cover aluminum vs. carbon fiber, leg sections, ball heads and how to protect a tripod in bad weather.
*From each manufacturer’s published specifications, checked September 2026.
A tripod is the one piece of camera gear hikers argue about the most. It never earns its keep on an easy afternoon walk, but on a summit at dusk, or under a clear night sky, it is the only thing standing between you and a blurry photo.
The trouble is choosing one. A tripod that is sturdy enough for a long lens is often too heavy to carry all day, and a tripod light enough to forget about in your pack is sometimes too flimsy for a gust of ridge-top wind. This guide walks through that trade-off in plain terms, using published weight, height and load figures instead of guesswork.
If you are still deciding on a camera to put on top of one of these, see our best camera for hiking guide, or our best video cameras for hiking and backpacking guide if you shoot mostly video.
Here’s what you’ll get from this guide:
- Six backpacking tripods compared by weight, folded length, height and load rating
- A plain-English breakdown of aluminum vs. carbon fiber legs
- How leg sections, folded length and ball heads affect real trail use
- Travel, tabletop and full-size tripods compared side by side
- How to protect a tripod (and your camera) from cold, rain, sand and salt
- Common mistakes that leave hikers with a wobbly or too-heavy setup
Best Backpacking Tripod: The Quick Answer, Explained
There is no single best backpacking tripod for every hiker, because the right pick depends on how much weight you are willing to carry and how much camera you are putting on top of it. For most hikers who want one tripod that handles almost everything, the Peak Design Travel Tripod in carbon fiber is the strongest all-around choice. It packs to 15.5 inches, reaches 60 inches tall, and carries up to 20 pounds, according to Peak Design’s own specifications.
If you count every gram, the SIRUI Traveler X-III is lighter still at about 2.1 pounds, with an even higher published load rating of roughly 22 pounds. The trade-off is a smaller brand ecosystem and fewer accessories than Peak Design offers.
🧭 Full tripod, or something smaller?
Not every hiker needs a full-size tripod. A flexible tabletop model can wrap around a fence rail, tree branch or trekking pole for many trailside shots, at a fraction of the weight. We compare all three formats in the travel vs. tabletop vs. full-size section below.
Weight is not the only thing that matters here. A tripod that is technically light but wobbles in the wind, or that will not reach eye level, causes its own kind of frustration. That is why every pick below is judged on the full package: weight, stability, folded size and how much camera it can safely hold.
The best backpacking tripod is not the lightest one you own. It is the lightest one you will actually pull out of your pack when the shot needs it.
Top Picks at a Glance
This table lines up all six picks by weight, folded length, maximum height and load rating, straight from each maker’s own spec sheet, so you can shortlist fast before reading the full write-ups below.
| Tripod | Material | Weight | Folded length | Max height | Load rating |
|---|---|---|---|---|---|
| Peak Design Travel Tripod | Top pick Carbon fiber | 2.8 lb | 15.5 in | 60 in | 20 lb |
| MeFOTO BackPacker Classic | Aluminum | 2.6 lb | 12.6 in | 51.2 in | 8.8 lb |
| Manfrotto Befree Advanced | Carbon fiber | 2.8 lb | 16.1 in | 59.1 in | 19.8 lb |
| SIRUI Traveler X-III | Carbon fiber | 2.1 lb | About 13.8 in | 60 in | About 22 lb |
| JOBY GorillaPod 5K Kit | Aluminum, flexible legs | 1.63 lb | Fixed; about 15.2 in tall | About 15.2 in (tabletop) | 11 lb |
| Vanguard VEO 2 265CB | Carbon fiber | 2.9 lb | 16.4 in | 59 in | 17.6 lb |
A few things jump out once they are side by side. Every travel tripod here weighs under 3 pounds, so the real decision usually comes down to folded length and load rating rather than raw weight. The GorillaPod is the outlier: it does not extend like the others, but its flexible legs let it grip a rail or branch that no rigid tripod could use at all.
How We Chose These Tripods
Every tripod here is a current model sold new on Amazon.com, from an established tripod or camera-support brand, chosen to cover the ways hikers actually shoot: a lightweight all-rounder, a budget aluminum option, a mid-range carbon pick, an ultralight carbon pick, a flexible tabletop option, and a sturdier tripod for bigger camera and lens combinations. We did not test these tripods ourselves. Instead, we compared specifications published directly by Peak Design, MeFOTO, Manfrotto, SIRUI, JOBY and Vanguard, cross-checked against retailer listings and the Amazon pages linked below. Read more about our approach on our methodology page.
We prioritized five things for every pick: weight, folded length (does it actually fit in or on a pack), maximum height, published load rating, and the type of head included. We left out any tripod where we could not confirm current specs from a manufacturer page, a major retailer’s spec sheet, or an Amazon listing. The result spans a wide range of budgets and priorities, from an ultralight carbon pick built for thru-hikers to a sturdier option for hikers carrying heavier camera and lens combinations.
📋 A note on honesty
Nobody paid for a spot on this list, and none of these brands reviewed this article. Where a tripod has a real limitation, like a low load rating or a short reach, we say so plainly in its “best for” line.
The Best Backpacking Tripods
These six span the range hikers actually shop in, from an ultralight carbon pick to a flexible tabletop tripod that wraps instead of folding.
🏆 Best all-around pick
Peak Design
Peak Design Travel Tripod (Carbon Fiber)
Packs to the width of a water bottle, yet reaches 60 inches with a 20-pound load rating.
Peak Design built this tripod around one problem: normal tripods are wide and awkward in a pack because their legs sit apart even when folded. This one’s five-section legs close almost flush against the center column and integrated ball head, so the whole thing packs to 15.5 inches and about the diameter of a water bottle. It has no separate head to buy or lose, which simplifies the kit.
- Folds to 15.5 in, close to water-bottle width
- 20 lb published load rating, high for its weight class
- Integrated ball head with Arca-type quick release
- Five-section legs with quick-release cams
| Weight | 2.8 lb (1.27 kg) |
|---|---|
| Folded length | 15.5 in |
| Max / min height | 60 in / 5.5 in |
| Load rating | 20 lb |
| Leg sections | 5 |
Best for: hikers who want one tripod that does almost everything well. Limitation: it costs noticeably more than the aluminum and budget picks on this list.
🛒 Buy from Amazon Check today’s price on Amazon.
💰 Best budget pick
MeFOTO
MeFOTO BackPacker Classic Aluminum Travel Tripod
A 2.6-pound aluminum tripod that reverse-folds to 12.6 inches, the shortest pack size here.
Aluminum tripods usually give up folded compactness to hit a lower price, but the BackPacker Classic does the opposite. Its five aluminum leg sections reverse-fold around the head, so it packs down to just 12.6 inches, shorter than every carbon fiber tripod on this list, according to MeFOTO’s published specifications. It includes an Arca-type ball head and a carrying case.
- Reverse-folds to 12.6 in, the shortest here
- Includes an Arca-type ball head and case
- Two-position independent leg-angle stops
- Lower cost than the carbon fiber picks
| Weight | 2.6 lb |
|---|---|
| Folded length | 12.6 in (reverse-folded) |
| Max height | 51.2 in |
| Load rating | 8.8 lb |
| Leg sections | 5, twist locks |
Best for: hikers on a budget who mainly carry mirrorless cameras or compacts. Limitation: an 8.8 lb load rating and 51.2 in max height are both lower than the carbon fiber picks here.
🛒 Buy from Amazon Check today’s price and colors on Amazon.
⚖️ Best balance of height and weight
Manfrotto
Manfrotto Befree Advanced Carbon Fiber Travel Tripod
Reaches 59.1 inches with the column extended, near the top of this list, at 2.8 pounds.
Manfrotto’s Befree Advanced line has been a common sight on hiking trails for years, and the carbon version keeps the same four-section leg design with quick twist locks. Published specs list a 59.1-inch maximum height with the center column extended, a 19.8-pound load rating and a 16.1-inch folded length, a well-rounded set of numbers for a mid-range tripod.
- 59.1 in max height, tall enough for most standing shots
- 19.8 lb published load rating
- Only 4 leg sections, so it opens quickly
- 494 ball head with pan lock and friction control
| Weight | 2.8 lb |
|---|---|
| Folded length | 16.1 in |
| Max height | 59.1 in (column extended) |
| Load rating | 19.8 lb |
| Leg sections | 4 |
Best for: hikers who want a taller working height without the shortest possible folded length. Limitation: it folds a little longer than the Peak Design and MeFOTO picks.
🛒 Buy from Amazon Check today’s price on Amazon.
🪶 Lightest full-size pick
SIRUI
SIRUI Traveler X-III Carbon Fiber Tripod
About 2.1 pounds with a published load rating near 22 pounds, the lightest full-height tripod here.
If every ounce counts on multi-day trips, the Traveler X-III is built for that priority. SIRUI lists it at about 2.1 pounds with a 60-inch maximum height and a published load capacity around 22 pounds, higher than any other tripod on this list despite being the lightest. Reverse-folding legs and a reversible center column keep its packed size close to 13.8 inches.
- About 2.1 lb, the lightest full-size tripod here
- Published load rating around 22 lb
- Reaches 60 in, matching the Peak Design pick
- Reversible center column and reverse-folding legs
| Weight | About 2.1 lb (950 g) |
|---|---|
| Folded length | About 13.8 in |
| Max height | 60 in |
| Load rating | About 22 lb |
Best for: ultralight backpackers and thru-hikers who count every ounce. Limitation: SIRUI has a smaller accessory and support network than Peak Design or Manfrotto.
🛒 Buy from Amazon Check today’s price on Amazon.
🐙 Best for wrapping onto rocks and branches
JOBY
JOBY GorillaPod 5K Kit
Flexible wrap-around legs rated for up to 11 pounds, at just 1.63 pounds itself.
The GorillaPod does not extend and fold like the other tripods here. Instead its flexible, ball-jointed legs wrap around a fence rail, tree branch, boulder or trekking pole, which opens up angles a rigid tripod cannot reach. JOBY’s published specs list it at about 1.63 pounds (739 g) with an 11-pound payload, enough for a mirrorless body with a mid-size lens attached.
- Wraps around rails, branches and poles instead of just standing
- About 1.63 lb, the lightest support on this list
- 11 lb published payload for its size
- Ball head with Arca-type quick release plate
| Weight | About 1.63 lb (739 g) |
|---|---|
| Height | About 15.2 in (fixed; does not telescope) |
| Load rating | 11 lb (5 kg) |
| Legs | Flexible, ball-jointed, wrap-around |
Best for: hikers who want a compact backup support, not a tall standing tripod. Limitation: it cannot reach eye level on flat ground the way a telescoping tripod can.
🛒 Buy from Amazon Check today’s price and bundle options on Amazon.
🪨 Best for heavier camera setups
Vanguard
Vanguard VEO 2 265CB Carbon Fiber Tripod
Five-section carbon legs and a BH-50 ball head, built for bigger mirrorless and DSLR bodies.
Hikers who carry a larger mirrorless body with a longer zoom, for wildlife or landscape work, need more margin than an 8-pound load rating gives. Vanguard’s published specs list the 265CB at 2.9 pounds with a 17.6-pound load rating and a 59-inch maximum height, plus five leg sections with quick-flip locks and independently spreading legs for uneven ground.
- 17.6 lb load rating, well above the budget picks here
- 59 in max height with 5 leg sections
- Independent leg-angle spread for rocky or uneven ground
- BH-50 ball head with quick-release plate included
| Weight | 2.9 lb |
|---|---|
| Folded length | 16.4 in |
| Max height | 59 in |
| Load rating | 17.6 lb |
| Leg sections | 5 |
Best for: hikers carrying a heavier mirrorless or DSLR kit with a longer lens. Limitation: at 2.9 lb it is the heaviest tripod on this list, though only by a few ounces.
🛒 Buy from Amazon Check today’s price on Amazon.
Prices and stock change often, so check each listing before you buy. As an Amazon Associate, HikingCare earns from qualifying purchases, at no extra cost to you.
How to Choose a Backpacking Tripod
Once you understand a handful of trade-offs, picking the right tripod gets much easier. Here is what actually matters on the trail.
Weight vs. Stability: The Core Trade-off
Every gram you shave off a tripod usually costs you something in stability, thinner, lighter leg tubes flex more in wind and transmit more vibration from your hands or the ground. The tripods on this list manage that trade-off well for their weight class, but physics still applies. A 2-pound tripod will never be as rock solid as a 6-pound studio tripod. The right question is not “which tripod is most stable,” but “which tripod is stable enough for how I actually shoot, at a weight I will actually carry.”
Aluminum vs. Carbon Fiber Legs
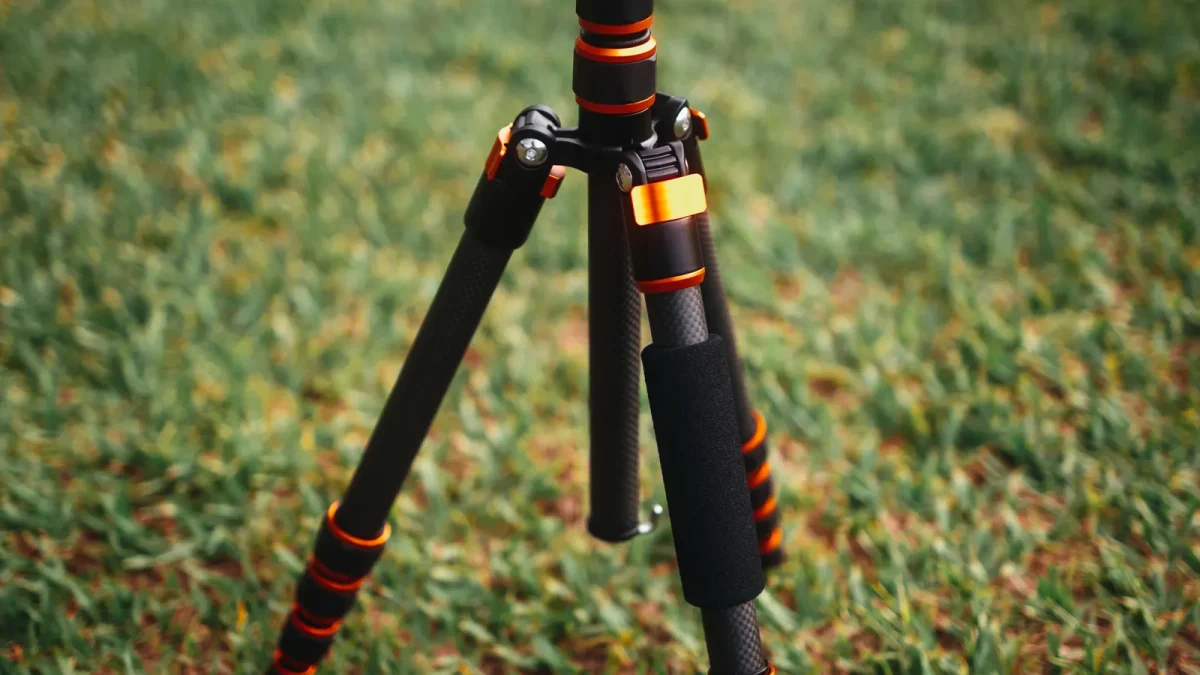
Aluminum tripods, like the MeFOTO BackPacker Classic here, cost less and are nearly as strong for their size, but they weigh more than an equivalent carbon fiber design. Carbon fiber tripods, like the Peak Design, Manfrotto, SIRUI and Vanguard picks above, cut weight by roughly 15 to 25 percent over a similar aluminum design and dampen vibration a little better, which helps with longer exposures. The trade-off is price: carbon fiber tripods typically cost noticeably more than aluminum tripods with similar features.
Neither material is “wrong.” If you hike a few times a month and want to save money, aluminum is a perfectly good choice. If you hike often enough that the weight adds up over a season, carbon fiber’s ounces start to matter more than its price tag.
Leg Sections and Folded Length
More leg sections generally mean a shorter folded length, since each section telescopes into the next, but also a little more flex at each added joint. A 4-section tripod like the Manfrotto Befree Advanced opens faster and has fewer joints to loosen over time. A 5-section tripod like the Peak Design or MeFOTO packs shorter, which matters if you are sliding it into a side pocket built for a water bottle. Folded length also decides whether a tripod fits inside your pack at all, so check it against your own pack’s dimensions before you buy, not just its weight.
Load Rating and Ball Heads
A tripod’s published load rating is the maximum weight the maker says it can support. Add up your camera body, your heaviest lens and any accessory like a microphone or light, then leave real margin. A tripod loaded right at its rated maximum has little room for a gust of wind or an uneven rock. Most backpacking tripods here use a ball head: loosen one knob and the camera moves freely in every direction, then one twist locks it again. That single-knob design is lighter and faster than the pan-tilt heads common on video tripods, which is why nearly every pick on this list uses one.
💡 Leave a safety margin on load rating
A common rule of thumb among tripod reviewers is to treat the published load rating as a ceiling, not a target, and stay comfortably under it, especially in wind. If your camera and lens are close to a tripod’s rated maximum, size up rather than push the limit.
Phone and Camera Mount Adapters
Every tripod on this list ships with, or accepts, a standard 1/4-inch camera screw mount. To use a phone instead, add a small spring-loaded phone clamp with the same 1/4-inch screw thread; these are inexpensive and widely available separately from the tripod itself. If you already carry trekking poles, some hikers also use a separate pole-top phone or action-camera adapter for a lightweight monopod-style shot, though that is a different accessory from the tripods reviewed here.
Travel vs. Tabletop vs. Full-Size Tripods
Beyond the six picks above, it helps to understand the three broad formats tripods come in. Each one solves a different problem, and many hikers end up happiest mixing formats rather than forcing one tripod to do every job.
| Format | Typical weight | Height in use | Best for | Trade-off |
|---|---|---|---|---|
| Tabletop / flexible | Roughly 1–2 lb | Roughly 6–15 in | Wrapping onto rails, rocks or branches; packed backup support | Cannot reach eye level on flat ground |
| Compact travel (carbon) | Top pick for backpacking Roughly 2–3 lb | Roughly 55–61 in | Most backpackers who want one do-it-all tripod | Costs more than an equivalent aluminum tripod |
| Compact travel (aluminum) | Roughly 2.5–3.5 lb | Roughly 45–55 in | Budget-conscious or occasional use | Usually a little heavier and shorter than carbon |
| Full-size studio tripod | Roughly 4–6+ lb | Roughly 65–70+ in | Heavy telephoto lenses, maximum stability | Too heavy and long for most backpacks |
Notice that the “best” format depends entirely on the trip. A flexible tabletop tripod earns its spot in an ultralight kit precisely because it is not trying to be a full-height tripod. A full-size studio tripod belongs in a car-camping or roadside setup, not a multi-day pack. For most hikers who want a single, versatile piece of gear, a compact carbon fiber travel tripod is the sweet spot between weight and capability.
Protecting Your Tripod (and Camera) in the Field
A tripod is simple mechanically, but weather and grit still cause most of its problems. A little routine care keeps legs, locks and heads working smoothly for years.
Cold weather mostly affects your camera, not the tripod itself, since tripods have no battery. Keep spare camera batteries in an inner jacket pocket, close to your body, since lithium-ion batteries lose a meaningful share of their capacity as temperatures drop toward freezing. Metal leg locks and ball heads can also stiffen in the cold, so give a frozen lock a moment of gentle pressure rather than forcing it.
Rain and stream crossings are the next biggest risk. Wipe down wet legs before you pack the tripod away, since trapped moisture promotes corrosion inside aluminum tubes and can attract grit into twist locks. Salt water is worse still: if a leg touches salt spray or a tide pool, rinse it with fresh water as soon as you reasonably can, then dry it fully before storing it.
- Brush off sand and grit before folding the legs. Trapped grit is the most common cause of a twist lock that will not tighten fully.
- Dry the tripod before long-term storage. A damp tripod bag left packed for weeks is a good recipe for corrosion on aluminum parts.
- Keep spare camera batteries warm, not the tripod. The tripod itself has nothing to protect from cold beyond its own metal parts.
- Check the ball head lock before every trip. A lock that has quietly loosened is how cameras get dropped, not a design flaw in the tripod.
None of this is complicated, but it is easy to skip when you are tired at the end of a long day. A two-minute wipe-down before the tripod goes back in its bag is the difference between years of smooth use and a lock that seizes up by next season.
Common Mistakes (and How to Fix Them)
1. Buying on weight alone
❌ The mistake: choosing the lightest tripod on the shelf without checking its load rating against your actual camera and lens.
✅ The fix: weigh your heaviest camera and lens combination first, then pick a tripod rated well above that number.
2. Ignoring folded length
❌ The mistake: buying a tripod that is light enough, but too long to fit a pack’s side pocket or main compartment.
✅ The fix: measure your pack’s side pocket or the space you plan to use before you buy, and compare it to the tripod’s published folded length.
3. Extending the center column first
❌ The mistake: raising the center column for extra height instead of extending the legs fully.
✅ The fix: extend the legs all the way first, and use the center column only for small final adjustments. A raised column is the least stable part of any tripod.
4. Never testing the ball head under load
❌ The mistake: assuming the ball head lock will hold, without checking it with your actual camera attached.
✅ The fix: lock the head, let go with both hands, and gently push the camera before you trust it near a ledge or slope.
5. Packing it away wet or gritty
❌ The mistake: folding up a sandy or wet tripod and leaving it in its bag for days.
✅ The fix: brush off grit and dry the legs before storage, and rinse off any salt water as soon as you can.
6. Choosing a format that does not match the trip
❌ The mistake: carrying a full-size studio tripod on a multi-day trip, or a tabletop tripod when you need eye-level shots on flat ground.
✅ The fix: match the format to the trip using the travel vs. tabletop vs. full-size comparison above before you pack.
Pro Tips for Stable Trail Shots
None of these require buying anything new, and all of them come up again and again in tripod and landscape photography guidance.
- Extend the thickest leg sections first. They are the stiffest, so use them before the thinner, lower sections for the most stable base.
- Spread the legs wide on uneven or rocky ground. Most ball heads and leg-angle stops allow a wider stance for extra stability, not just a taller one.
- Hang your pack from the center column hook, if your tripod has one. The extra weight low down helps steady a light tripod in wind.
- Use a 2-second self-timer or remote shutter. Pressing the shutter button by hand is one of the most common causes of blur on an otherwise steady tripod.
- Practice folding and unfolding at home first. Learning the leg locks and head controls before your trip saves time at camp when the light is fading fast.
- Weigh your full camera kit before you buy. Our Pack Weight Calculator helps you see how a tripod’s ounces fit into your total base weight.
A tripod only helps if it comes out of the bag. The lightest one you will actually use beats the sturdiest one left at home.
Real-World Examples
These are composite examples built from patterns hikers commonly share in gear forums, reviews and trail journals. They are not individual testimonials, but they show how different priorities lead to different tripod choices.
Notice that none of these hikers chased the single “best” tripod on paper. Each matched the format and load rating to what they actually carry and shoot, which is the more useful question to bring to your own decision.
Frequently Asked Questions
Do I really need a tripod for hiking photography?
Not always. Many daytime trail shots work fine handheld. A tripod earns its weight for long exposures, low light, self-portraits, group shots and video, situations where a steady camera matters more than speed.
What is the lightest backpacking tripod?
Among our picks, the JOBY GorillaPod 5K is lightest at about 1.63 pounds, though it does not extend to eye level. For a full-height tripod that telescopes like a traditional design, the SIRUI Traveler X-III is lightest at about 2.1 pounds.
Is carbon fiber worth the extra cost over aluminum?
It depends on how often you hike. Carbon fiber typically cuts 15 to 25 percent of the weight of a similar aluminum design and dampens vibration slightly better. If you hike often enough that the weight savings add up, it is usually worth the price gap. For occasional use, aluminum is a sound, cheaper choice.
Can I use my phone on a backpacking tripod?
Yes. Every tripod in this guide uses a standard 1/4-inch camera screw mount. Add an inexpensive spring-loaded phone clamp with the same thread, and any of these tripods can hold a phone instead of a camera.
How much load rating do I actually need?
Add up your heaviest camera body and lens combination, including any microphone or light you might attach, then choose a tripod rated comfortably above that total. Loading a tripod right at its published maximum leaves little safety margin in wind or on uneven ground.
Your Backpacking Tripod Checklist
Work through this list before you buy, then again before a big trip. Each step protects either your photos or your budget.
Tap each item as you complete it. Your progress is saved in this browser.
- Weigh your heaviest camera and lens combination
- Pick a load rating comfortably above that weight
- Measure your pack’s pocket against the tripod’s folded length
- Decide between aluminum and carbon fiber based on how often you hike
- Choose a format: tabletop, compact travel or full-size
- Check that the head type (ball head vs. pan-tilt) suits how you shoot
- Test the ball head lock under real camera weight before you rely on it
- Add a simple field-care routine: brush off grit, dry wet legs, rinse off salt
The Bottom Line
The best backpacking tripod is the one whose weight, folded length and load rating actually match your camera and your trips. The Peak Design Travel Tripod is the strongest all-around pick, the SIRUI Traveler X-III shaves off the most weight, the MeFOTO BackPacker Classic keeps costs down, and the JOBY GorillaPod earns its spot when a rigid tripod cannot reach the angle you want.
🎒 Plan the rest of your kit
Use our free tools to plan pack weight and gear before your next trip.
🎒 Gear Planner ⚖️ Pack Weight Calculator ✅ Checklist Generator
Keep reading: the best cameras for hiking, the best video cameras for hiking and backpacking and the best camera backpacks for hiking.
Sources
- Peak Design: Travel Tripod product page
- B&H Photo: Peak Design Carbon Fiber Travel Tripod specifications
- B&H Photo: Manfrotto Befree Advanced Carbon Fiber specifications
- B&H Photo: Vanguard VEO 2 265CB specifications
- Backscatter: JOBY GorillaPod 5K Kit specifications
- SLR Lounge: cold-weather battery tips
Facts checked in September 2026. Specs and availability change, so confirm details on the manufacturer’s page before you buy.
You may also like
Best Camera for Hiking in 2026: Compact, Mirrorless and Phone Picks
Seven cameras compared by weight, sensor size, weather sealing and cold-weather battery life, plus an honest look at when a phone is…
How to Clean Hiking Boots: A Complete Care Guide
Mud, salt and sweat wear boots out fast. Here is how to clean hiking boots by material, dry them safely, fix odor…
Best Camping Tent Brands: How the Top Names Compare (2026)
Not all tent brands are alike. See what Big Agnes, MSR, NEMO, Coleman, Kelty and REI Co-op each do best, their price…

Get better at hiking.
Practical hiking tips, gear guides, trail advice and outdoor stories, delivered occasionally. No spam, unsubscribe any time.