How to Clean Hiking Boots: A Complete Care Guide
Mud, salt and sweat wear boots out fast. Here is how to clean hiking boots by material, dry them safely, fix odor and store them so they last for years.
HikingCare is reader-supported. When you buy through links on our site we may earn a commission at no extra cost to you. How we choose what to recommend.
🧼 Quick answer
Wondering how to clean hiking boots the right way? Brush off loose dirt, wash with a soft brush and a cleaner made for the upper material, then air-dry away from any heat source.
The exact steps change with the material. Leather, suede, nubuck and synthetic uppers each need a slightly different cleaner and touch. Skip the washing machine and the radiator, and your boots will last far longer.
*Based on LOWA’s official boot-care guide.
Mud, grit and salt build up on every hike. Left alone, they dry stiff, crack the leather and wear out stitching long before its time.
The good news: cleaning hiking boots is simple once you know the right steps for your boot’s material. This guide walks you through washing, drying, deodorizing and storing leather, suede, nubuck and synthetic boots. It uses care advice straight from boot makers and the Gore-Tex brand itself. If you’re still shopping for your first pair, start with our guide to the best hiking boots.
We also cover laces, insoles and a few mistakes that quietly shorten a boot’s life. If your boots have lost their water resistance too, our companion guide on how to waterproof hiking boots picks up right where this one ends.
Here’s what you’ll get from this guide:
- A simple cleaning routine for leather, suede, nubuck and synthetic boots
- A table matching each material to the right cleaner and method
- The mistakes that crack leather and wreck waterproof linings, explained
- How to dry boots fast without damaging them
- Fixes for boot odor and stubborn winter salt stains
- A simple schedule for how often to clean, condition and reproof
How to Clean Hiking Boots: The Short Version
Here is the fast version. Most hikers can follow these five steps for almost any boot.
- Prep the boot. Pull out the laces and insoles. Knock or brush off dry mud and grit.
- Wash with the right cleaner. Use a soft brush, lukewarm water and a cleaner made for your boot’s material.
- Rinse and wipe. Remove soap residue with a damp cloth so nothing dries sticky or stiff.
- Air-dry away from heat. Stuff boots with paper and let them dry at room temperature, never on a radiator or in the sun.
- Condition or reproof. Once dry, feed leather with a conditioner or refresh a fabric boot’s water repellency.
That five-step routine matches what REI’s boot-care advice and the official GORE-TEX footwear care instructions both recommend. It works whether your boots are full-grain leather, suede, nubuck or synthetic mesh. The details change by material, and that is what the rest of this guide covers.
A five-minute clean after a muddy hike does more for a boot’s lifespan than a conditioner applied once a year.
One more thing before you start: read your boot’s own care tag or the maker’s website first. Brands like Merrell, LOWA and Salomon publish boot-specific instructions, and following them keeps you inside any warranty. You can browse more hiking boots guides on fit, buying and waterproofing while you’re at it.
Why Cleaning Your Boots Actually Matters
Dirt is not just cosmetic. Grit works into seams and stitching every time a boot flexes. It grinds away at the material like sandpaper, according to REI’s expert advice on boot care.
Mud does its own damage. Wet mud pulls natural oils out of leather as it dries. That leaves the hide stiffer and more likely to crack. Left on a synthetic boot, dried mud can clog the mesh and slow down drying after the next stream crossing.
Neglected boots also lose their water resistance faster. A durable water repellent (DWR) finish sheds water by making it bead up and roll off. Dirt and body oils coat that finish over time. Water then soaks in instead of beading. That is why the GORE-TEX brand’s own footwear care page lists cleaning as the first step before any reproofing.
ℹ️ It’s about lifespan, not looks
A clean boot is not just a tidier boot. REI notes that regular cleaning helps hikers enjoy many years on the trail with the same pair, and it reduces the need to replace boots before they are actually worn out.
None of this takes long. Most boots need a real clean every few hikes, plus a quick brush-down after every single one. The rest of this guide shows exactly how, material by material.
What You Need Before You Start
You do not need a huge kit to clean hiking boots properly. A handful of basic supplies covers almost every situation.
- A stiff-bristled brush for knocking off dried mud, plus a softer brush for suede and nubuck.
- A bucket or bowl of lukewarm water. Hot water can loosen glued soles and dry out leather.
- A cleaner made for footwear. Mild liquid detergent works for most boots. Suede and nubuck need a dedicated cleaner and eraser.
- A leather conditioner if your boots have a leather upper.
- Old newspaper or paper towels to stuff into wet boots and pull out moisture.
- A rag or old towel for wiping down the outside and drying laces.
Check your care label before you improvise. Merrell, LOWA and Salomon all publish their own boot-care pages. Following their advice is the safest way to protect a specific pair.
Use this table as a quick shopping list. Match it to the material breakdown further down this guide.
| Supply | What it’s for | Skip if… |
|---|---|---|
| Soft or medium brush | Loosening dry mud and dust before washing | You only hike on dry, dusty trails |
| Footwear cleaning gel or mild soap | Lifting oily dirt and sweat residue from the upper | Boots are only lightly dusty |
| Suede or nubuck eraser | Rubbing out scuffs and dark marks on napped leather | Your boots are smooth leather or synthetic |
| Leather conditioner | Replacing oils so leather does not dry and crack | Your boots are synthetic or mesh |
| Water-based DWR spray | Restoring beading water repellency after a deep clean | Water still beads well on the surface |
Prep Work: Laces, Insoles and Loose Dirt
Every good clean starts the same way, no matter what your boots are made of.
- Pull the laces out. Set them aside to wash separately in warm, soapy water, then air-dry.
- Remove the insoles. Moisture collects underneath them. LOWA’s care guide specifically calls this out as important after extended use.
- Knock off loose dirt. Bang the soles together outside, then use a dry brush on the upper before any water touches the boot.
- Check the outsole. Use a pick or a flat screwdriver to clear packed dirt and small stones from the tread’s lugs.
Skipping this step just turns dry dirt into wet paste. That paste smears into the material instead of lifting off. Merrell’s own care advice starts the same way: brush off surface mud and grit with a shoe brush before you ever add water.
💡 Do this after every hike
A 60-second brush-down as soon as you get home stops dirt from working into the seams. Save the full wash for every few hikes, or whenever boots look genuinely dirty.
This quick prep routine is also a good moment to check for problems while they are still small. A fraying lace, a loose eyelet or a lifting sole edge is much easier to deal with before it fails mid-hike. Get in the habit of a 10-second visual check every time you pull the laces out.
How to Clean Boots by Material
The biggest cleaning mistake is treating every boot the same way. A method that works well on synthetic mesh can ruin suede. A soap that is fine for leather can strip nubuck’s texture. Match the method to the upper.
| Upper material | Best cleaner | Method | Avoid |
|---|---|---|---|
| Full-grain or smooth leather | Common Footwear cleaning gel or a damp cloth with mild soap | Wipe with a soft cloth or brush, rinse residue, dry, then condition | Soaking, oil-based polish on Gore-Tex linings, direct heat |
| Suede and nubuck (napped) | Suede cleaner plus a suede eraser | Dry-brush first, use the eraser on marks, add water sparingly | Soaking, oil-based conditioners, regular shoe polish |
| Synthetic and mesh | Mild liquid detergent | Soft brush with soapy water, then rinse thoroughly | Bleach, strong solvents, stiff wire brushes |
| Waterproof-lined (Gore-Tex) uppers | Liquid detergent in lukewarm water | Brush off dirt, wipe with diluted detergent, rinse well | Waterproofing waxes, greases and stain removers |
Cleaning leather hiking boots
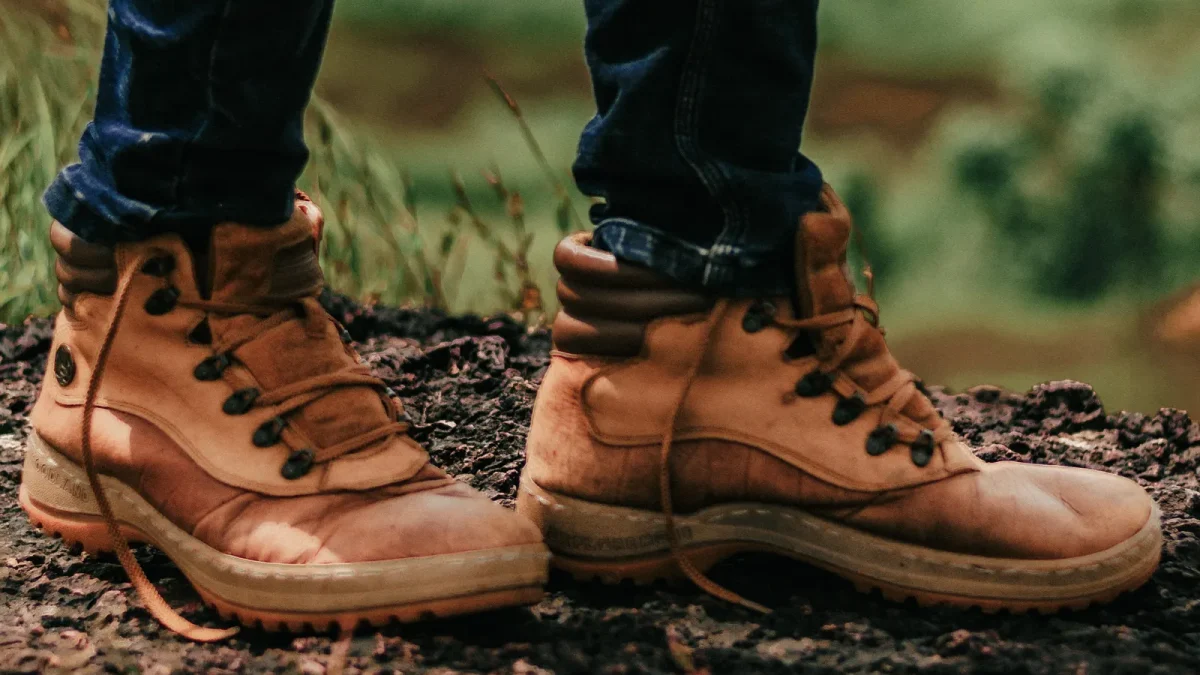
Full-grain leather is tough, but it still needs gentle handling. Wipe the upper with a damp cloth and a small amount of mild soap or a dedicated cleaner. Work in small circles.
For stubborn dirt, use a cleaner built for leather, not dish soap or laundry detergent. Those can strip away natural oils. Rinse away any soap residue with a barely damp cloth so nothing dries sticky.
Let the leather dry fully before conditioning. LOWA’s guide warns against oil or fat-based products because they close the pores of the leather. That can hurt breathability and long-term stability. A purpose-made conditioner, applied thin, is the safer choice.
Cleaning suede and nubuck boots
Suede and nubuck are both napped leather, so they need a drier touch. Start with a suede brush to lift dust and dried mud. Brush in one direction to restore the nap.
For scuffs, dark marks or grease spots, rub a suede eraser block back and forth over the area. The eraser crumbles as it works, lifting dirt without soaking the material.
Use water only if you must, and only with a cleaner made for suede. Regular shoe polish and oily conditioners are common mistakes on this material. They flatten the nap and leave a shine that never brushes back out.
Cleaning synthetic and mesh boots
Synthetic uppers and mesh panels are the easiest to clean. Mix a little mild soap into water, then scrub gently with a soft brush.
Rinse thoroughly. Soap left inside mesh can irritate skin or attract more dirt later. Merrell’s care guidance for mesh uppers follows the same pattern: soft brush, soapy water, thorough rinse.
Synthetic boots dry faster than leather, but they are not indestructible. Keep them away from the same heat sources that damage leather. Melted glue and a warped foam midsole are just as real a risk.
Cleaning Laces and Insoles Properly
Laces and insoles hold more sweat, salt and bacteria than most hikers realize. Cleaning the boot’s upper without addressing them leaves the smell and the grime behind.
Hand-wash laces in warm water with a little detergent. Work out ground-in dirt with your fingers or an old toothbrush. Let them air-dry fully before relacing, since damp laces can transfer moisture straight back into a clean boot.
Pull insoles out every time you clean the boot, not just occasionally. Merrell’s own FAQ recommends washing the sock-liner or insole separately. That helps keep the inside of the shoe fresher for longer.
Wipe insoles with a damp cloth and a little soap. Let them dry completely away from direct heat before putting them back in. A foam insole that goes back in still damp is one of the most common causes of lingering odor.
💡 Rotate a second pair of insoles
If you hike often, a spare set of insoles means one pair can dry fully for a day or two while you wear the other. It also makes the whole cleaning routine faster.
Laces are easy to overlook because they seem too small to matter. But dirty, salt-stiffened laces can transfer grime straight back onto a clean upper the next time you tie them. Treat them as part of the boot, not an afterthought, and your whole cleaning routine holds up longer.
How to Dry Boots Without Ruining Them
Drying is where most boot damage actually happens, not washing. Heat is the enemy of both leather and the glues that hold a boot together.
The GORE-TEX brand’s care instructions are direct about it. They say to dry naturally at moderate temperatures and avoid direct heat. That means no radiators, no car heater vents, no campfires and no direct sun on a hot dashboard.
Instead, stuff each boot loosely with crumpled newspaper or paper towels. The paper pulls moisture out from the inside, which usually stays wettest longest. Swap in fresh paper every few hours if the boots were soaked.
Stand boots somewhere with good airflow. Pull the tongue forward and loosen the laces so air reaches the whole interior. A small fan pointed at them speeds things up without adding heat.
Gore-Tex’s own guidance approves one more option: convection-style boot dryers. These circulate room-temperature or gently warmed air instead of blasting boots with direct heat. That makes them safe for leather and waterproof linings when used on a no-heat or low-heat setting.
⚠️ Never force-dry with direct heat
Direct heat from a radiator, heater vent, hair dryer or campfire can shrink leather. It can also melt synthetic glues, warp a midsole and damage a waterproof membrane from the inside. Patience is cheaper than a new pair of boots.
Plan for leather boots to take a day or two to dry fully. Synthetic or mesh boots usually dry faster, often overnight. If you need boots dry for tomorrow’s hike, start drying them the moment you get home instead of waiting.
Fixing Odor and Salt Stains
Two problems show up again and again after winter or sweaty summer hikes: smelly boots and chalky white salt stains.
Getting rid of boot odor
Odor comes from bacteria feeding on sweat trapped in the insole and lining. Washing the insoles and laces, as covered above, solves most of the problem on its own.
For boots that still smell, sprinkle a tablespoon or two of baking soda inside each one. Let them sit overnight. Baking soda is mildly alkaline, which helps neutralize the acidic compounds that cause the smell. It also soaks up leftover moisture. Shake out the powder in the morning and brush out any residue.
A deodorizing spray made for footwear is a faster option. Choose one labeled safe for leather, mesh and suede, and it will not leave a residue or discolor the material. Whatever method you use, always let boots dry completely between wears. A boot that never fully dries never really stops smelling.
Removing salt stains
Road salt and dried sweat both leave the same chalky white marks on leather. Left alone, that salt slowly draws moisture out of the leather and speeds up cracking. Winter hikers see this most on salted sidewalks and trailhead parking lots; our winter hiking gear guide covers other cold-weather gear care.
Brush or wipe away loose surface salt first, so you are not grinding it deeper into the leather. Then dab the stain with a cloth dampened in a mild solution of equal parts white vinegar and water.
Vinegar is acidic, so use it sparingly and only on the stained area. Rinse with a clean, barely damp cloth afterward. Let the leather dry fully, then condition it. Skipping the conditioner after a vinegar treatment is a common reason leather feels stiff afterward.
How to Store Boots Between Hikes
Good storage protects everything you just cleaned. Bad storage undoes it within a season.
Salomon’s own care guidance recommends storing boots in the open air, not in a bag, somewhere dry and out of the sun. A closed gear bag traps any leftover moisture and encourages mildew.
LOWA’s boot-care guide adds a second warning: avoid damp storage spots like an unheated garage or a bathroom, since damp environments can lead to mildew. Direct sunlight and nearby heat sources, like a furnace closet, also dry out leather over time.
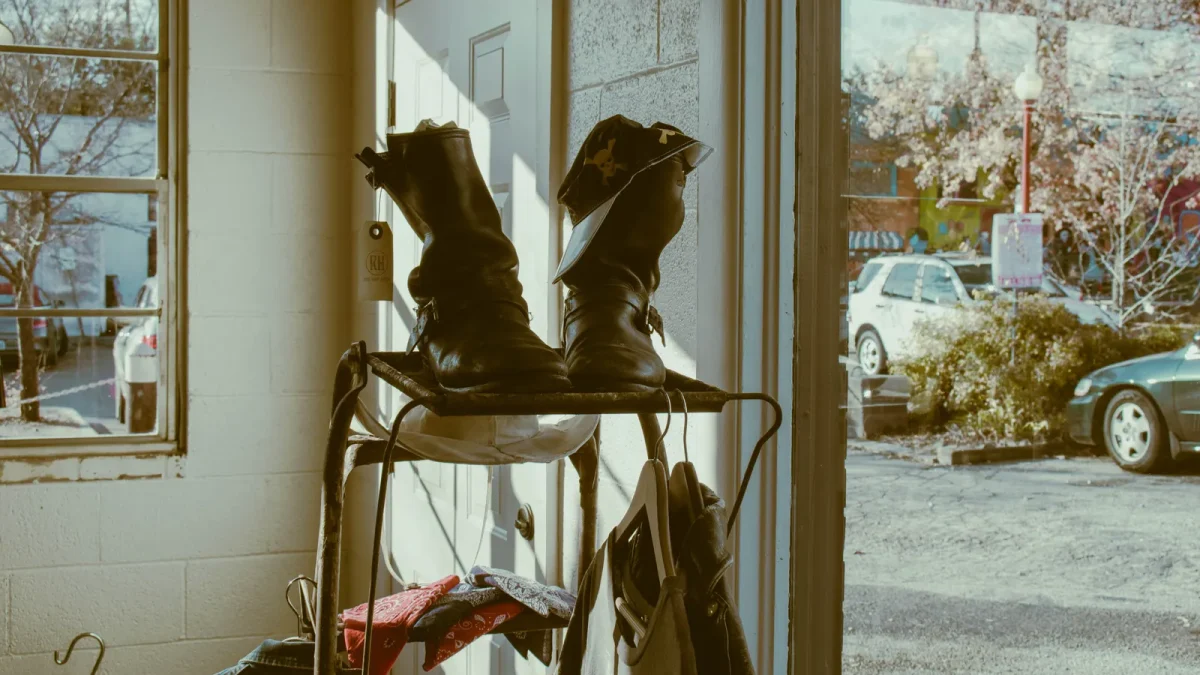
A mudroom shelf, an open closet or a boot rack near the entryway all work well. Keep boots away from radiators and out of direct sun. Loosen the laces and pull the tongue forward so air reaches inside.
If you are storing boots for an off-season, clean them fully first and let them dry completely. Add a light coat of conditioner or DWR before they go into storage. Boots put away dirty or damp are far more likely to come out cracked, moldy or musty next season.
Stuffing boots loosely with paper before long-term storage also helps them keep their shape. A boot that collapses in on itself for months can develop creases that never fully relax once you start hiking in it again.
How Often to Clean, Condition and Reproof
There is no single right schedule. It depends on how often you hike and what kind of terrain you cover.
| Hiking conditions | Full clean | Condition or reproof |
|---|---|---|
| Occasional, dry and dusty trails | Every 3 to 5 hikes | 1 to 2 times a season |
| Regular, mixed terrain | Every 1 to 2 hikes | Typical Every 3 to 4 months |
| Mud, snow or salted trails and sidewalks | After every outing | Whenever water stops beading |
| Heavy sweat or multi-day trips | After every trip, insoles and laces too | Check DWR before each trip |
The “every 3 to 4 months” guideline for reproofing comes directly from LOWA’s official boot-care guide. It also suggests a full care routine monthly for boots worn frequently. Gore-Tex’s own advice is simpler: reproof whenever water stops beading on the surface, no matter how much time has passed.
Conditioning leather is a separate schedule from reproofing a fabric boot’s DWR coating, though hikers often do both together. If your boots still shed water well but the leather looks dry or feels stiff, you likely need conditioner, not a waterproofing spray. Our companion guide on how to waterproof hiking boots covers reproofing products and testing water repellency step by step.
Write the date on a small piece of tape inside the tongue after each full clean or reproof. It sounds low-tech, but it is a simple way to track a schedule across a whole season without guessing.
Gear That Makes Boot Care Easier
You can clean boots with soap, water and an old toothbrush. A few inexpensive products still make the process faster and gentler on your gear. We picked these based on published specs and how well they match the materials and problems covered above. Nobody paid for a spot on this list.
🧽 Works on almost every upper
Nikwax
Nikwax Footwear Cleaning Gel
A sponge-on cleaner made for leather, suede, nubuck, fabric and synthetic boots alike.
This gel targets the oily dirt and body-oil residue that block water repellency, not just surface mud. Nikwax says it is safe for Gore-Tex and other waterproof, breathable linings. That makes it a solid one-bottle option if your closet holds more than one boot material.
- Works across leather, suede, fabric and synthetic uppers
- Nikwax recommends it for Gore-Tex, eVent and other waterproof footwear
- PFAS-free and non-flammable, and easy to apply by hand
- Sponge applicator makes it easy to work into seams and creases
| Size | 4.2 fl oz (125 ml) |
|---|---|
| Format | Sponge-on gel |
| Use on | Leather, suede, fabric, synthetic |
| Gore-Tex safe | Yes, per Nikwax |
Best for: hikers who want one cleaner for every boot in the closet. It will not strip deep scuffs on suede alone; pair it with a suede eraser for those.
🛒 Buy from Amazon Check today’s price on Amazon.
🧹 Best for suede and nubuck
Shoe care kit
Suede & Nubuck Shoe Cleaner Kit, 2-in-1 Brush & Eraser
A double-sided brush and a rubber eraser block for napped leather boots.
Suede and nubuck need a drier, gentler routine than smooth leather. This kit pairs a soft-bristle side for lifting dust and reviving the nap with a rubber eraser side for scuffs and watermarks. It is a cheap way to avoid the soap and water that can flatten napped leather.
- Soft brush side lifts dust without soaking the material
- Rubber eraser side lifts scuffs, grease marks and watermarks
- Works on suede and nubuck boots, bags and jackets
- No water or chemicals needed for everyday touch-ups
| Style | 2-in-1 brush and eraser block |
|---|---|
| Use on | Suede and nubuck footwear, bags, apparel |
| Water needed | No, dry use |
Best for: anyone with suede or nubuck hiking boots. It will not deep-clean an oil stain; use a suede-specific liquid cleaner for that instead.
🛒 Buy from Amazon Check today’s price on Amazon.
🧴 Keeps leather from cracking
Nikwax
Nikwax Conditioner for Leather
A sponge-on, water-based conditioner for smooth leather boots.
Cleaning leather strips away some of its natural oils along with the dirt. This conditioner replaces them, softening new leather and restoring suppleness to boots that already feel dry or stiff. Nikwax makes it water-based rather than oil or wax based, since oils and waxes can clog leather’s pores.
- Restores suppleness to dry or stiff leather
- Adds water repellency while reviving breathability
- Water-based formula, unlike oil or wax conditioners
- PFAS-free, per Nikwax’s own product page
| Size | 4.2 fl oz (125 ml) |
|---|---|
| Format | Sponge-on liquid |
| Use on | Smooth, full-grain leather footwear |
| Apply | To clean, damp leather |
Best for: leather boots that feel dry, stiff or dull after cleaning. Skip it on suede and nubuck, which need a dry-care routine instead.
🛒 Buy from Amazon Check today’s price on Amazon.
🌬️ Dries boots without direct heat
DryGuy
DryGuy Force Dry DX Boot and Shoe Dryer
A forced-air convection dryer with a heat and no-heat setting.
This dryer pushes gentle, moving air through four ports instead of blasting boots with direct heat. A heat and no-heat switch lets you dry delicate leather or waterproof linings on the cooler setting. The warm setting speeds things up for everyday synthetic boots.
- Convection forced-air design, the style Gore-Tex recommends over direct heat
- Heat and no-heat switch for different materials
- Four drying ports with two extensions for taller boots
- Automatic 3-hour shutoff timer
| Heat setting | About 105°F (40.5°C), plus a no-heat option |
|---|---|
| Ports | 4, with 2 extension tubes for tall boots |
| Dry time | About 1 to 2 hours for most items, per DryGuy |
| Timer | 3-hour automatic shutoff |
Best for: hikers who soak boots often in wet weather or after winter hikes. It costs more than air-drying; a good airflow spot and patience work too, just more slowly.
🛒 Buy from Amazon Check today’s price on Amazon.
🌸 Knocks out boot odor
Sof Sole
Sof Sole Fresh Fogger Shoe Deodorizer Spray
A non-aerosol spray built to target the bacteria that cause boot odor.
Washing insoles and laces solves most odor problems, but a lingering smell sometimes needs a direct fix. This spray targets the bacteria behind the smell instead of just masking it with fragrance. The maker says it will not discolor materials or leave a residue.
- Targets odor-causing bacteria instead of only masking smell
- Non-aerosol spray, so no propellant chemicals
- Safe for mesh, leather, canvas and suede, per the maker
- No residue or discoloration left behind
| Size | 3 fl oz |
|---|---|
| Format | Non-aerosol spray |
| Use on | Mesh, leather, canvas, suede |
Best for: boots that still smell after a proper wash and a full dry. It treats odor, not the moisture causing it, so dry boots fully first.
🛒 Buy from Amazon Check today’s price on Amazon.
Prices and stock change often, so check each listing before you buy. As an Amazon Associate, HikingCare earns from qualifying purchases, at no extra cost to you.
Common Mistakes (and How to Fix Them)
Most boot damage is not from hiking. It happens from cleaning and drying boots the wrong way at home.
1. Machine-washing boots
❌ The mistake: tossing muddy boots into the washing machine to save time.
✅ The fix: hand-clean instead. Both REI and the GORE-TEX brand warn against machine washing, since the tumbling and heat can damage adhesives, membranes and structure.
2. Drying boots next to a heater
❌ The mistake: propping wet boots by a radiator, wood stove or heater vent overnight.
✅ The fix: air-dry at room temperature, stuffed with paper. Use a convection boot dryer on a no-heat or low-heat setting if you need to speed things up.
3. Using harsh detergents or bleach
❌ The mistake: reaching for laundry detergent, dish soap or bleach on a tough stain.
✅ The fix: use a mild liquid detergent or a cleaner made for footwear. GORE-TEX’s own care page specifically says not to use bleach or stain removers on its footwear.
4. Oiling or waxing a breathable boot
❌ The mistake: rubbing a heavy oil or wax-based polish into a Gore-Tex-lined boot to protect it.
✅ The fix: use a water-based conditioner or DWR spray instead. LOWA warns that oils and waxes close the leather’s pores, which hurts breathability and can affect stability over time.
5. Ignoring the insoles and laces
❌ The mistake: cleaning only the outside of the boot and leaving damp insoles inside.
✅ The fix: pull both out every time you clean the boot. Wash and fully dry them separately, since they hold most of the sweat and odor.
6. Letting mud dry hard before brushing
❌ The mistake: leaving thick, wet mud to dry rock-hard on the boot for days.
✅ The fix: knock off loose mud the same day, while it is still soft. A quick brush now beats an hour of scrubbing dried clay later.
Pro Tips for Keeping Boots Trail-Ready
These small habits come up again and again in boot-care guidance from manufacturers and outdoor retailers.
- Clean sooner, not later. Dirt is easiest to remove before it dries hard, so a quick brush the same day beats a deep clean a week later.
- Always wear socks. Salomon’s own care advice notes that socks help keep a boot’s lining durable and odor free, since bare skin adds more oil and sweat directly to the lining.
- Test water beading before every trip. Splash a little water on a clean, dry boot. If it soaks in instead of beading, reproof before you head out.
- Keep a second pair of insoles. Rotating insoles gives each pair time to dry fully and speeds up your whole care routine.
- Read the material tag. A boot with mixed leather and mesh needs both cleaning methods, not just one.
- Match your cleaner to your boot. A suede eraser will not help a leather boot, and a leather conditioner can flatten suede’s nap.
The boots that last the longest are rarely the most expensive pair. They are the pair someone actually cleans and dries properly.
These are composite examples built from patterns hikers commonly share in trail journals, reviews and online communities. They’re not individual testimonials.
Real-World Cleaning Routines
What these three hikers have in common: none of them wait until boots look ruined. Each one matched the cleaning method to the material and the conditions. Each one gave boots real time to dry before wearing them again. None of them needed an expensive kit either, just the right basic tools used consistently after every hike.
Frequently Asked Questions
Can I put hiking boots in the washing machine?
No. REI and the GORE-TEX brand both advise against it. Machine tumbling and heat can damage adhesives, waterproof membranes and the boot’s structure. Hand-clean instead with a brush and mild cleaner.
How do I clean hiking boots without a special cleaner?
A soft brush, lukewarm water and a small amount of mild liquid detergent work for most synthetic and leather boots in a pinch. Avoid bleach, heavy dish soap and any stain remover.
How often should I clean my hiking boots?
Brush off loose dirt after every hike. Plan on a full clean every one to five hikes, depending on how muddy your trails are. Reproof every three to four months, or whenever water stops beading.
Can I use a hair dryer to speed up drying?
It is best to avoid it. Direct heat from a hair dryer can shrink leather, warp foam midsoles and damage waterproof linings. Air-dry with paper stuffing, or use a convection boot dryer on a no-heat setting.
Why do my boots smell even after cleaning?
Odor usually lives in the insoles and laces, not just the upper. Wash and fully dry both separately. Sprinkle baking soda inside overnight, and make sure the boots are bone dry before you wear them again.
Do suede hiking boots need different care than leather boots?
Yes. Suede and nubuck need a dry-brush and eraser routine with very little water. Smooth leather can handle a damp cloth, mild soap and a water-based conditioner.
Your Boot-Cleaning Checklist
Use this checklist every time you give your boots a proper clean, from prep through storage.
Tap each item as you complete it. Your progress is saved in this browser.
- Remove laces and insoles before you start
- Brush off loose, dry dirt first
- Match your cleaner to the upper material
- Wash with a soft brush and lukewarm water
- Rinse away all soap or cleaner residue
- Air-dry away from any direct heat source
- Wash laces and insoles separately, then dry fully
- Condition leather or reproof fabric once dry
- Store boots open, dry and out of direct sun
The Bottom Line
Learning how to clean hiking boots comes down to matching the method to the material, then giving boots real time to dry the right way. Brush first, wash gently, rinse well, and never rush drying with direct heat.
Do that consistently, along with regular conditioning or reproofing, and a good pair of boots can outlast several pairs that were cleaned carelessly.
🥾 Keep your gear trail-ready
Use our free tools to plan your next hike and track your gear.
Keep reading: how to waterproof hiking boots, how hiking boots should fit and how to buy hiking boots.
Sources
- REI Co-op: How to Clean Hiking Boots
- GORE-TEX Brand: Footwear Care Instructions
- LOWA: Boot Care Guide
- Salomon: How to Clean and Care for Your Hiking Shoes
- Merrell: Shoe Care Accessories & Maintenance
- Nikwax: Footwear Cleaning Gel
Facts checked in September 2026. Care instructions can vary by model, so check your boot’s own label first.
You may also like
How to Buy Hiking Boots: A Step-by-Step Guide (2026)
Buying hiking boots gets easy when you follow a simple order: match the boot to your hikes, choose materials and waterproofing, then…

Are Combat Boots Good for Hiking? An Honest Answer (2026)
Combat boots can handle short, rough or cold hikes, but most are heavier, stiffer and hotter than hiking boots. Here’s how they…

Best Hiking Boots in 2026: How to Choose the Right Pair
How to pick hiking boots that suit your trails: grip, ankle support, waterproofing, weight and sizing — plus when a trail runner…

Get better at hiking.
Practical hiking tips, gear guides, trail advice and outdoor stories, delivered occasionally. No spam, unsubscribe any time.